Garden Tractor Forums banner
41 - 60 of 75 Posts
Discussion starter · #41 ·
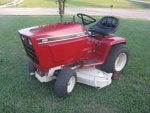
Breaking for lunch and figured I'd upload some progress pic's. I literally had to destroy the hydro filter to get it off. Finally got the rear end cleaned up and closed up. Brake parts are painted. Front clip is put back together. I used Rustoleum black bedliner as the paint on all of the black parts. It has so much sheen to it that the grille almost looks like it doesn't have anything on it. It looks good in person though.


Attachments

That hydro filter looks like it took a beating. At least you weren't trying to get it off with the rear still in the tractor. Looks like you had a nice sunny day for washing it up. Thanks for the update.
 
Wow Someone must have really torqued that filter when it was installed. Your resto is looking good so far. Keep up the good work. loking farward to seeing your progress. :thumbs: Rick
 
Discussion starter · #44 ·
Rear end is ready to be bolted back up. Some one decided it was a good idea to make the top two bolts that hold the axle tubes on go all the way through... These two bolts also hold the axle to the frame... These two bolt holes are also below the fill line for the rear end.
 

Attachments

Discussion starter · #45 ·
That hydro filter looks like it took a beating. At least you weren't trying to get it off with the rear still in the tractor. Looks like you had a nice sunny day for washing it up. Thanks for the update.
Yeah, I don't have band style filter wrench and I can usually get them off by hand but this one was stupid tight. Actually the filter is the reason I pulled the rear end. I'm glad I did thought because it was pretty nasty and needed to be cleaned up.
 
Discussion starter · #46 ·
I got the rear axle bolted back up, and filled. I wished I had the time to do a full frame off restore but I need to get this thing out of the middle of the floor so I can get my seeds starting table set up.
 

Attachments

Bobby, That is really coming along nicely. I can't wait to see it all back together. Nice job!
 
That is looking good, Bobby!
 
Discussion starter · #49 ·
Thanks guys. I hope I can get a decade or two of mowing service out of this thing.

Last summer this thing would increase spead while going down hill so. It's missing the spead control knob so I would alwasy just keep a hand on it, anyway this thread: http://gardentractortalk.com/forums/topic/19935-what-does-the-trunion-do-on-the-hydro-pumps/ led me to think that the creeping speed was due to a worn trunion. So while I had the rear end apart I inspected the trunnion parts and they have no visiable wear on them. If I didn't know better I would think they were new.
 
Nice work B! I too love the x82 Cubs.
 
  • Like
Reactions: twostep
I got the rear axle bolted back up, and filled. I wished I had the time to do a full frame off restore but I need to get this thing out of the middle of the floor so I can get my seeds starting table set up.
Since you don't have time for it, give me your addy, Berea is only 2 1/2 hrs south. I will come pick it up and finish it for you, ...did I forget to mention it takes me like 10 yrs to do one :smilewink: :D

looking good. I so have to get my Sears back together!!
 
Discussion starter · #52 ·
Since you don't have time for it, give me your addy, Berea is only 2 1/2 hrs south. I will come pick it up and finish it for you, ...did I forget to mention it takes me like 10 yrs to do one :smilewink: :D

looking good. I so have to get my Sears back together!!
haha, I know the trick you are trying to pull!! No chance! Besides I've got to leave something to do a couple of winters from now! Unless she sucks down the fuel too bad, this girl's going to pull mowing duty this summer so I've get her operational.

I got the rear tins back on last night and went to fire it up but it wouldn't do anything so I dug up the wiring schematic today and will check it out tonight. The spring bar that is on the brake pedel rock shaft broke so it might not be pushing the safety switch in far enough.
 
Discussion starter · #54 ·
Well I've eliminated all of the safety switches except the PTO/safety switch... it doesn't seem to be operating according to the schematic that is attached.

I am also cleaning up the wiring considerably; eliminating the reverse/PTO relay, the seat safety switch and and puting some protection in areas that didn't previously have.


Attachments

Discussion starter · #55 ·
I hate when I have to take things back apart... :wallbanging:

Got the wiring figured out. Eliminated the reverse relay and the momentary starter safety/PTO switch took a crap on me... odd that it happened when it did but once I wired around it I got fire again. I'm going to replace it with a SPST and add a push style momentary safety elsewhere. PTO is wired through a relay that can only be activated while the key is on. This will keep me from starting when the PTO engaged and it will keep an engaged PTO from draining my batter.

So wiring is figured out:


:bigrofl:

Luckily I'm an engineer for an automotive wiring company :smilewink:
 

Attachments

I have had 2 of those style PTO switches mess up like that. Probably corrosion inside!
 
  • Like
Reactions: twostep
Sure looking good so far. Nice work. :thumbs:
 
  • Like
Reactions: twostep
Discussion starter · #58 ·
Got the wire finished up today. I'll work on the new modified schematic tomorrow.

I moved the solenoid to the front, no need in having extra wires running the full length of the frame. Now only a large power wire and one wire for the tail lights run to the back. I'm going to rig up a set of switched backup lights after I get down with all of the manditory stuff. Here is the 60amp (more than I need but all I had in stock and way less than the fuse max on that large wire) close to the battery:


These are a couple of improvments on the wires that went through the "firewall" to the coil, pto, starter and headlights. I added some protection and cleaned the routing up a bit:


Another spot that need some upgrade:


I installed the nw switches. The PTO switch is just a standard SPST switch and the one down below (where a broken fuse holder was) is the momentary safety switch for the starter. This will keep you (or a child) from just reaching over and starting the mower. These switches are out of a Peterbuilt that my FIL's company was junking. They are heavy duty:


The bat + wire and the starter wire are held in place by a sheet metal style tie-band clamp:


The new wiring layout, note the new relay, the absence of the reverse relay, and the new starter relay location.


My little helper, she loves to be out in the garage with me!


And like I mentioned before... I have a hard time stopping when it comes to tearing down:


Attachments

Looks like some great help you have there! Wiring is looking good!
 
  • Like
Reactions: twostep
Discussion starter · #60 ·
Front axle is back on. Steering box is tightened up. Waiting on new tie rod ends to get the steer linkages put back on. This old girl is going to be smooth this summer.
 

Attachments

41 - 60 of 75 Posts